GeoDjango With OpenLayers 4 and PostGIS
TemplateView
Renders a given template, with the context containing parameters captured in the URL.
Core Settings TEMPLATES
TEMPLATES is a list containing the settings for all template engines to be used with Django.
By default setup, the Django template engine to load templates from the templates subdirectory inside each installed application:
TEMPLATES = [
    {
        'BACKEND': 'django.template.backends.django.DjangoTemplates',
        'DIRS': [],
        'APP_DIRS': True,
...
    },
]
Create a new one template
Create a new simple index.html in the templates/network_topology directory
under the network_topology application.
├── templates
│   └── network_topology
│       └── index.html
The following sample index.html file is the default HTML file that appears in a browser when a user invokes http://127.0.0.1:8000/network_topology/
<!DOCTYPE html>
<html>
<head>
  <meta charset="utf-8" />
  <title>Network Topology with OpenLayers 4</title>
  <meta name="viewport" content="initial-scale=1.0, user-scalable=no, width=device-width">

</head>
<body>
   <p>Network Topology With OpenLayers 4 and PostGIS</p>
</body>
</html>
Writing View
A view function, or view for short, is simply a Python function
that takes a Web request and returns a Web response. Create the IndexView class
in views.py.
from django.shortcuts import render

# Create your views here.

from django.views.generic.base import View, TemplateView
from django.http.response import HttpResponse

class IndexView(TemplateView):
    # a template file name in the templates directory in current application
    template_name = 'network_topology/index.html'

    def get_context_data(self, **kwargs):
        return kwargs
Edit URLconf Application
Then we just need to add this new view into our URLconf.
from django.urls import path
from .views import IndexView

app_name = 'network_topology'
urlpatterns = [
    path('', IndexView.as_view(), name='index'),
]
Edit URLconf Project
Append the urlpatterns variable with URLconf Application
urlpatterns = [
    path('admin/', admin.site.urls),
...
    path('network_topology/', include('network_topology.urls', namespace="network_topology")),
]
OpenLayers
Additional Locations of staticfiles App and Project
Configuring staticfiles app on STATICFILES_DIRS in project settings.py.
This setting defines the additional locations the staticfiles app
will traverse if the FileSystemFinder finder is enabled.
See staticfiles settings for details.
# Additional locations of static files
STATICFILES_DIRS = (
    # look for static files in a folder called static in our root folder, not just in our apps.
    os.path.join(BASE_DIR,'static'),
...
    os.path.join(BASE_DIR,'network_topology','static'),
)
Place the CSS and JavaScript files in the header
Place the OpenLayers CSS and JavaScript files in the header. Download OpenLayers LayerSwitcher from github. OpenLayers LayerSwitcher grouped layer list control for an OpenLayer map.
ol-layerswitcher.css: copy to staticfiles projectkapany/static/csslayerswitcher.css: copy to staticfiles appkapany/network_topology/static/network_topology/css
In my case the project name is kapany.
<head>
  <meta charset="utf-8" />
...
  <script src="https://openlayers.org/en/v4.6.5/build/ol.js"></script>
  <link rel="stylesheet" href="https://openlayers.org/en/v4.6.5/css/ol.css" type="text/css">
  <!-- stylesheet staticfiles project -->
  <link rel="stylesheet" href="{% static 'css/ol-layerswitcher.css' %}" />
  <!-- stylesheet staticfiles application -->
  <link rel="stylesheet" href="{% static 'network_topology/css/layerswitcher.css' %}" />
</head>
Place the Javascript file before the closing </body> tag
<body>
...
   <!-- script staticfiles project -->
   <script type="text/javascript" src="{% static 'js/ol-layerswitcher.js' %}"></script>
   <!-- script staticfiles application  -->
   <script type="text/javascript" src="{% static 'network_topology/js/layerswitcher.js' %}"></script>
</body>
Place the Map <div> tag
<body>
   <div id="map"></div>
   <!-- script staticfiles project -->
...
</body>
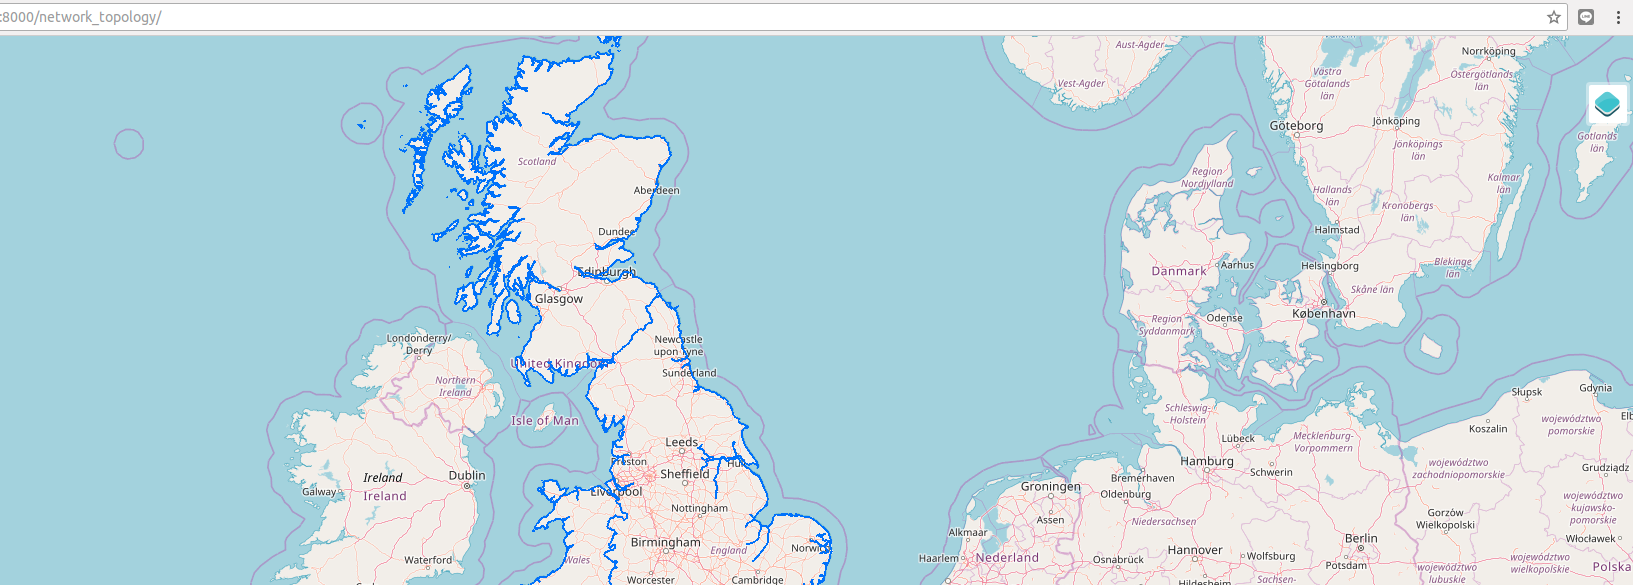
Browsing the Map
Browsing the Map with http://127.0.0.1:8000/network_topology/. You might see the similarity Map like below image or on OpenLayers LayerSwitcher Basic usage.
PostGIS
GeoJSON Serializer
On views.py, appending python path with serializers and AdministrativeLevel2Boundaries.
Create a new BoundariesGeoJSON class.
This class will filter boundaries objects contains with pnt.
...
from django.core.serializers import serialize
from .models import AdministrativeLevel2Boundaries
from django.contrib.gis.geos import Point

class IndexView(TemplateView):
...
class BoundariesGeoJSON(View):
    def get(self, request):
        lonlat = request.GET.get('lonlat').split(',')
        pnt = Point(float(lonlat[0]), float(lonlat[1]))
        geojson = {}
        if pnt:
            geojson = serialize('geojson', AdministrativeLevel2Boundaries.objects.filter(geom__contains=pnt),
            geometry_field='geom',
            fields=('amp_namt',))
        return HttpResponse(geojson)
Edit URLconf Application
from django.urls import path
from .views import IndexView, BoundariesGeoJSON

app_name = 'network_topology'
urlpatterns = [
    path('', IndexView.as_view(), name='index'),
    path('BoundariesGeoJSON/', BoundariesGeoJSON.as_view(), name='BoundariesGeoJSON'),
]
Add GeoJSON layer to OpenLayers
Edit javascript staticfiles network_topology/static/network_topology/js/layerswitcher.js. Add this content on top of file:
// url call class in views.py
var sourceThailandBoundaries = new ol.source.Vector({
  ratio: 1,
  params: {'LAYERS': 'show:0'},
  url: '/network_topology/BoundariesGeoJSON/?lonlat=null',
  format: new ol.format.GeoJSON()
});

var vectorThailandBoundaries = new ol.layer.Vector({
  title: 'Thailand - Boundaries',
    source: sourceThailandBoundaries
});

var select = new ol.interaction.Select({
  layers:[
      vectorThailandBoundaries,
  ]
});
Replace the old Overlays Layer
Find this content in App javascript staticfiles layerswitcher.js:
...
layers: [
    new ol.layer.Image({
        title: 'Countries',
        source: new ol.source.ImageArcGISRest({
            ratio: 1,
            params: {'LAYERS': 'show:0'},
            url: "https://ons-inspire.esriuk.com/arcgis/rest/services/Administrative_Boundaries/Countries_December_2016_Boundaries/MapServer"
        })
    })
]
...
Next, replace with:
layers: [
  vectorThailandBoundaries,
]
Center map to thailand
Find this line
center: ol.proj.transform([-0.92, 52.96], 'EPSG:4326', 'EPSG:3857'),
Next, replace with:
center: ol.proj.fromLonLat([101, 13]);
OpenLayers Feature singleclick event
Using OpenLayers Feature singleclick event to read data from geodjango model.
Find line map.addControl(layerSwitcher) then append with:
...
// feature selectable
map.addInteraction(select);

// pull feature from database
map.on('singleclick', function(evt) {
  var coordinate = evt.coordinate;

  var lonlat = ol.proj.transform(coordinate, 'EPSG:3857', 'EPSG:4326');

  var source = new ol.source.Vector({
    url: '/network_topology/BoundariesGeoJSON/?lonlat='+lonlat,
    format: new ol.format.GeoJSON()
  });
  vectorThailandBoundaries.setSource(source);
  // set center map on coordinate
  map.getView().setCenter(coordinate);
  map.getView().setZoom(11);
});
...
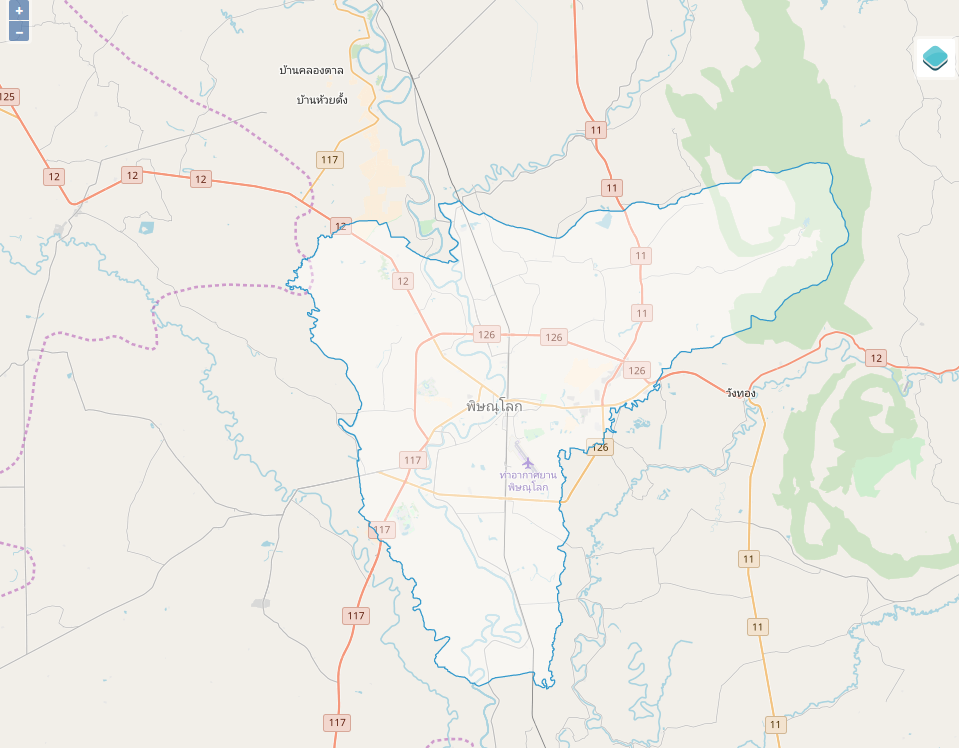
Browsing the Map
Try to click somewhere on map